In the previous post, we discussed how to choose a high-quality Tactrix Openport 2.0 Clone. Today we share another guide for correct resistors in order to make it work with the network connection.
The HQ openport 2.0 clone does not allow network connection without modification. Otherwise, it will brick the device.
How to Modify Tactrix Openport 2.0 Clone to Enable Network Connection?
Disclaimer: the modification guide was made by a Russian technician from drive2. You are at your risk. We are not holding the responsibility for your damage.
Here are the tips to modify the Openport 2.0 HQ clone with black board to avoid damage when connecting with the network.
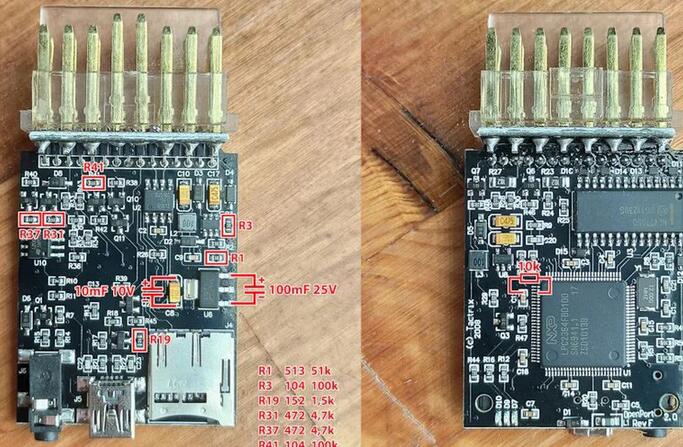
6 resistors were soldered in each ( check table of replacements ) to bring them into line with the original, one additional resistor and two electrolytic capacitors were soldered to the LM voltage regulator (aka LD-shka, aka AMS1117). And both work and are not afraid of the Internet.
table of ratings and replacements
| orig | the clone | Replacement of herbs. | China Black board | Replacement | |
| R1 | 51k | 01D | 513 | 103 | 513 |
| R2 | 01C | 01D | 103 | 103 | |
| R3 | 01D | 01D | 103 | 104 | |
| R4 | 2,2m | 2,2m | 225 (R9) | ||
| R5 | 220k | 220k | 224 | ||
| R6 | 220k | 220k | 224 | ||
| R7 | 2,7k | 2,7k | 272 | ||
| R8 | 74C | 74С | 74С | ||
| R9 | 01C | 01D | 103 | 103 | |
| R10 | 74C | 74C | 74C | ||
| R11 | 01C | 01D | 103 | 103 | |
| R12 | 1,5k | 13B (1,33k) | 152 | 152 | |
| R13 | 22k | 22k | 223 | ||
| R14 | 01C | 01D | 103 | 103 | |
| R15 | 01C | 01D | 103 | 103 | |
| R16 | 240 | 240 | 241 | ||
| R17 | 01C | 01D | 103 | 103 | |
| R18 | 2,2k | 2,2k | 222 | ||
| R19 | 1,5k | 01B (1k) | 152 | 01B (1k) | 152 |
| R20 | 4,7k | 4,7k | 472 | ||
| R21 | 22 | 22 | 220 | ||
| R22 | 22 | 22 | 220 | ||
| R23 | 1k | 1k | 102 | ||
| R24 | 22k | 22k | 223 | ||
| R25 | 2,2k | 2,2k | 222 | ||
| R26 | 01C | 01D | 103 | 103 | |
| R27 | 1k | 1k | 102 | ||
| R28 | 22k | 22k | 223 | ||
| R29 | 2,2k | 2,2k | 222 | ||
| R30 | 01C | 01D | 103 | 103 | |
| R31 | 4,7k | 2,7k | 472 | 272 | 472 |
| R32 | 470 | 470 | 471 | ||
| R33 | 22k | 22k | 223 | ||
| R34 | 1.8k | 1.8k | 182 | ||
| R35 | 22k | 22k | 223 | ||
| R36 | 01B | 01B | 01B | ||
| R37 | 4,7k | 2,7k | 472 | 272 | 472 |
| R38 | 01C | 01D | 103 | 103 | |
| R39 | 2,7k | 2,7k | 272 | ||
| R40 | 2,7k | 2,7k | 272 | ||
| R41 | 01D | 2,7k | 104 | 272 | 104 |
| R42 | 01C | 01D | 103 | 103 | |
| R43 | 2,7k | 2,7k | 272 | ||
| R44 | 2,7k | 2,7k | 272 | ||
| R45 | 01C | 01D | 103 | 103 | |
| R46 | 2,2k | 2,2k | 222 | ||
| R47 | 01C | 01D | 103 | 103 | |
| R48 | 2,2k | 2,2k | 222 | ||
| R49 | 74C | 74C | 74C | ||
| R50 | 01C | 01D | 103 | 103 | |
| R51 | 74C | 74C | 74C | ||
| R52 | 01C | 01D | 103 | 103 | |
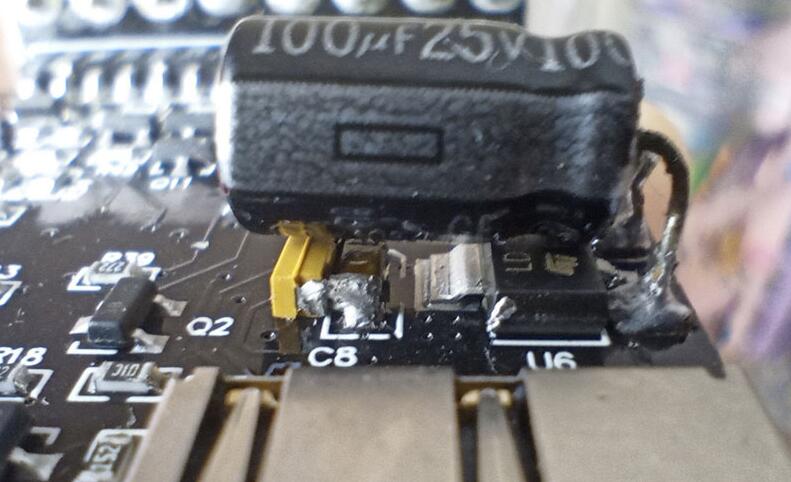
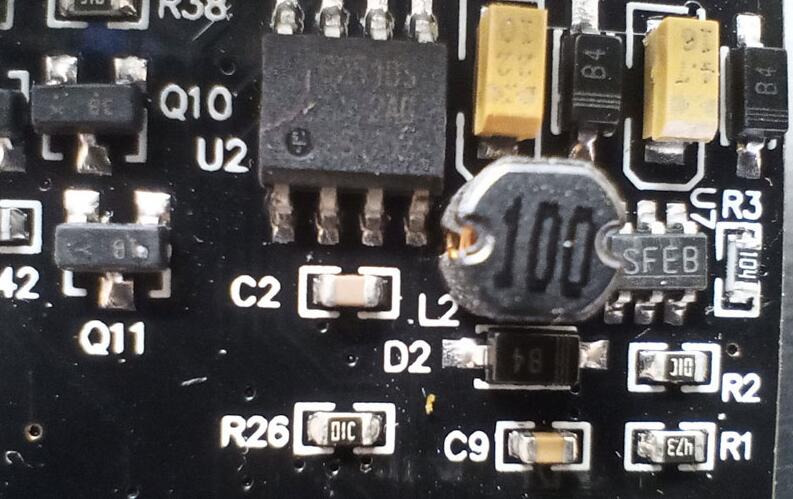
In parallel to C8, 10 uF ceramics are soldered.
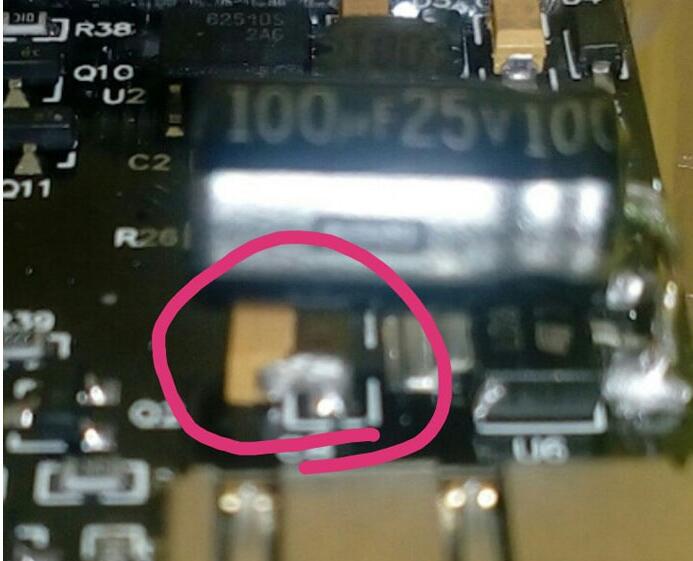
LM-ke for output 1 and 3 electrolyte 100×25.

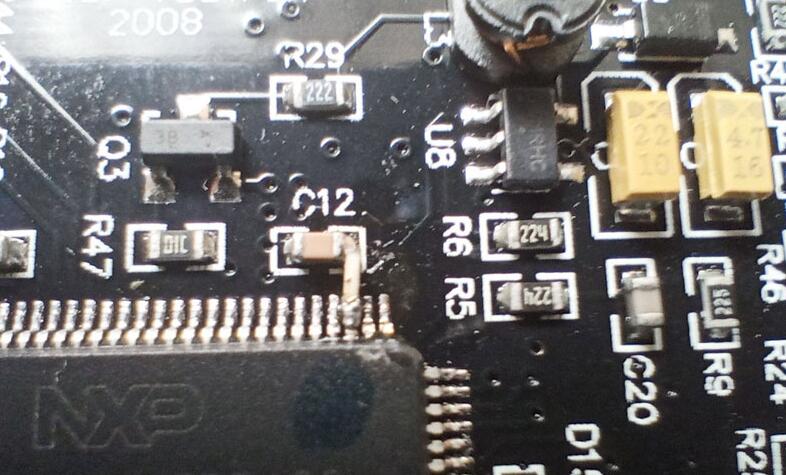
But in pulled up to the plus through a 10k resistor from C12.

Butpin 53 output – 10k pull-up connection points.
In sum in order to replacing the resistors on the Tactrix Openport 2.0 Clone, you can do the following:
1). To capacitor C8, soldered a ceramic capacitor of 10 uF
2). On pins 1 and 3 of LD33, added an electrolytic capacitor of 100 uF, 25 V.
3). From plus C12 to pin 53 (P2[10] /EINT0) LPC2364, added a 10 kΩ resistor. This modification prevents the bootloader located in the LPC2364 from starting when the RESET command is given to the microcontroller.
Everything you do is at your own risk, we are not responsible for dead adapters.
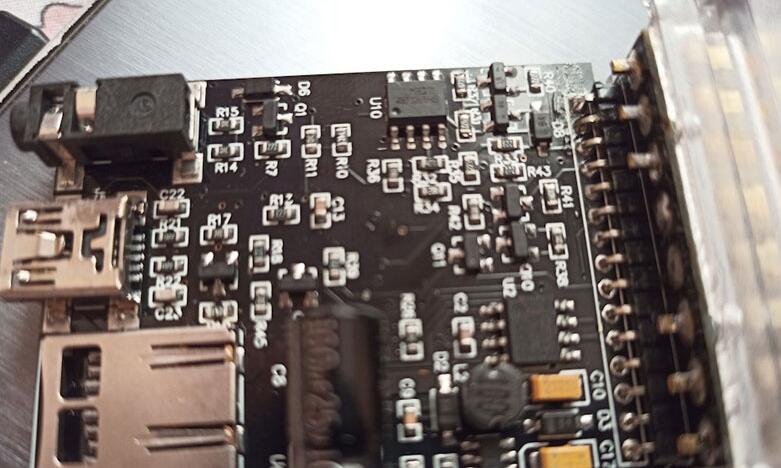
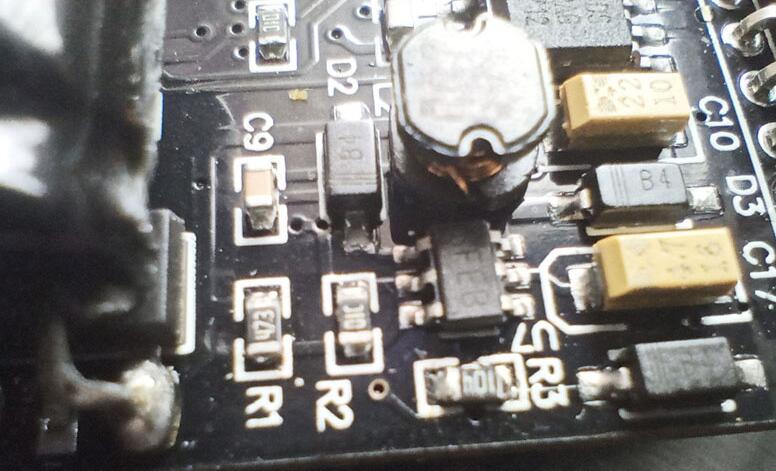
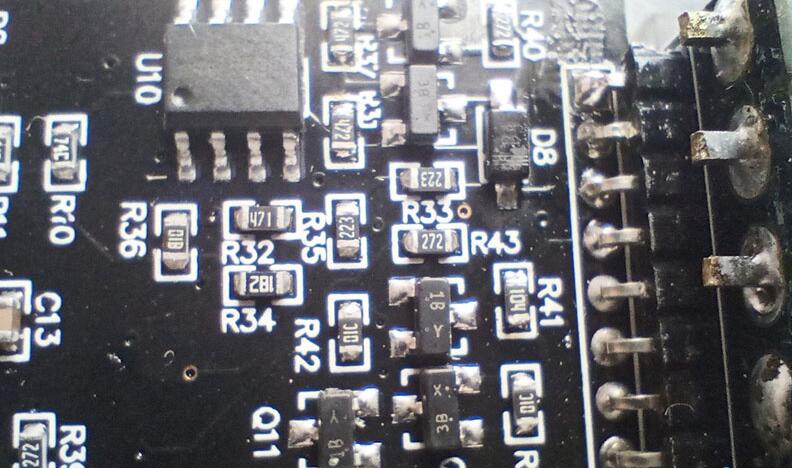
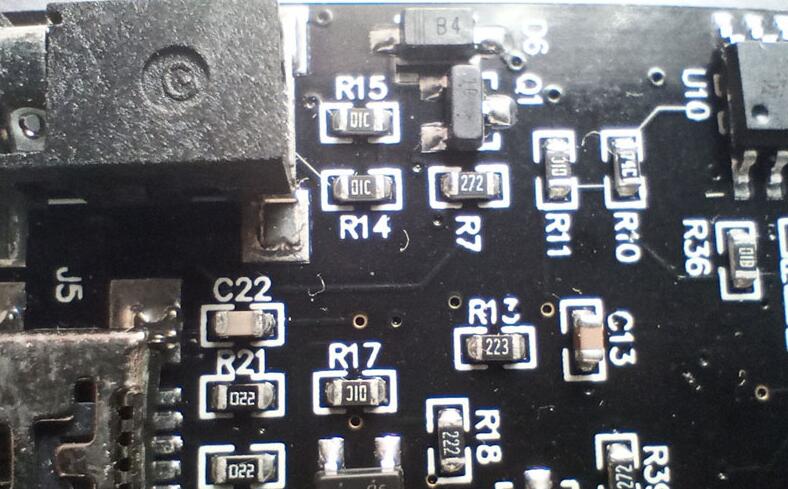
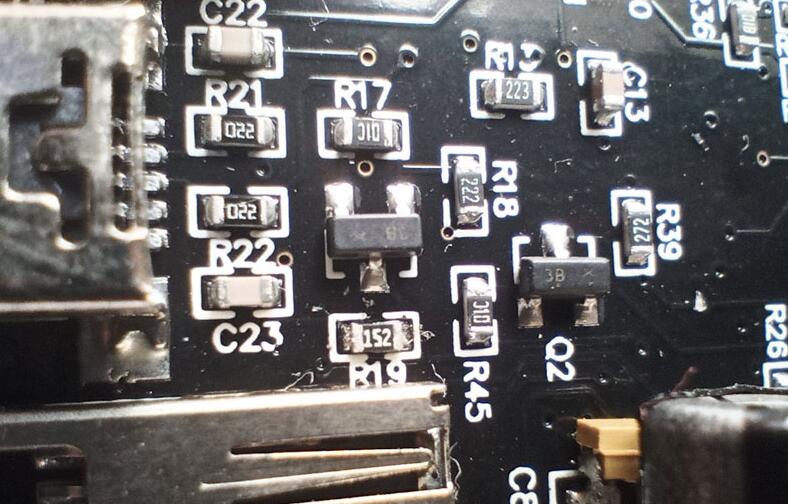
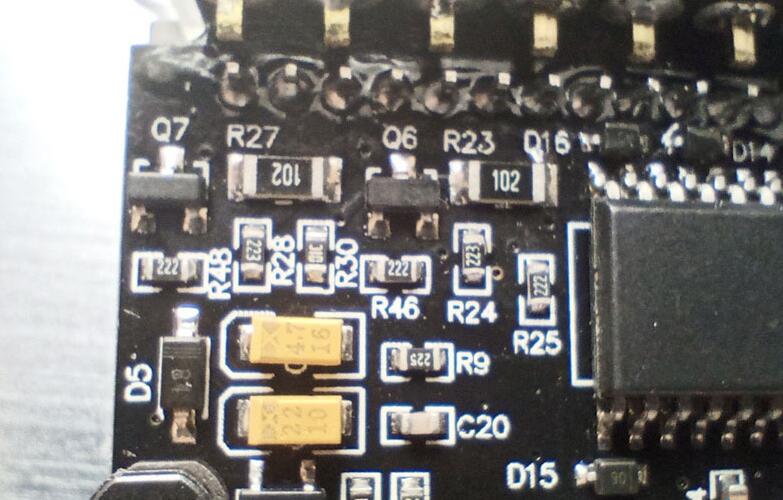
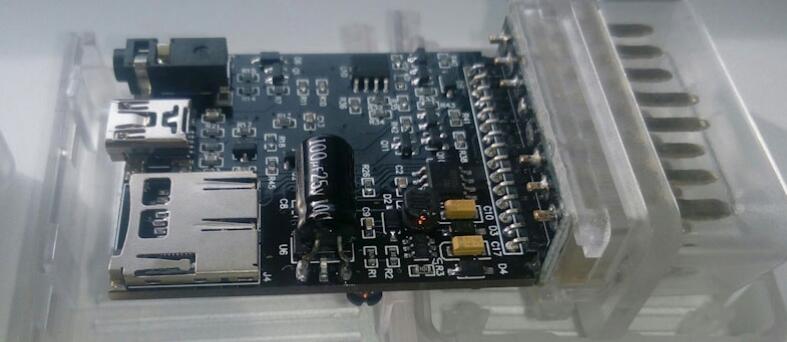
More detail component pictures