Original JLR VCI Jaguar Land Rover diagnostic tool supports both USB and WiFi connection. Here’s the guide to connect JLR VCI via USB.
To setup USB connection, you need to download Bosch driver for VCI first:
https://mega.nz/#!aqwnhbQS!KS7QhERmZ4cCcZfvT2iXkdYN6ynz9vDQ3DmPQRGm0TU
Open Bosch_Driver folder
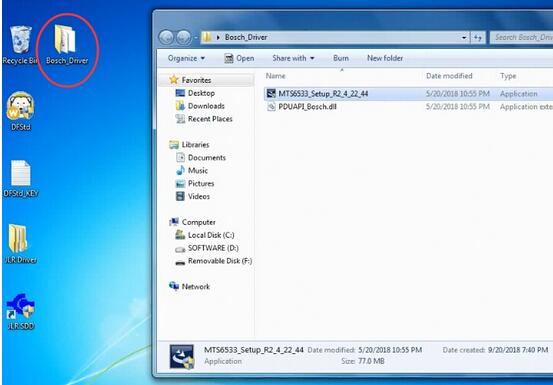
Open MTS6533_Setup
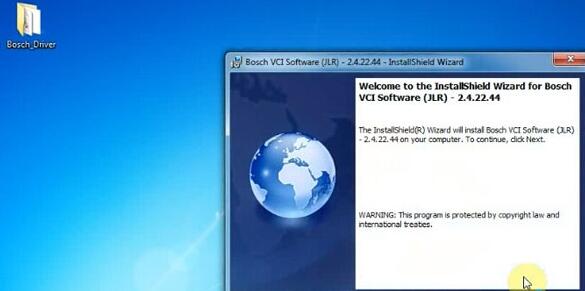
Install Bosch VCI Software (JLR)
Press Next
Press Next
Press Install
Finish installing Bosch VCI software
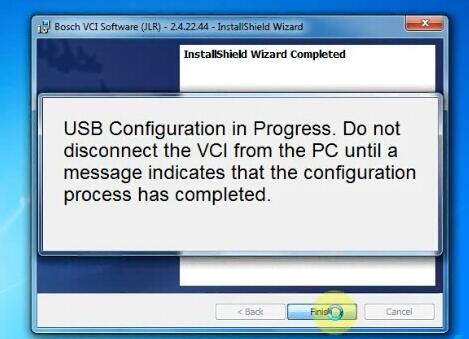
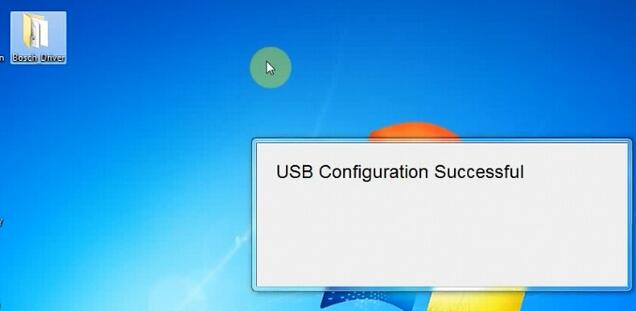
USB Configuration in progress. Don’t disconnect JLR VCI from PC until a message indicates that the configuration process has completed.
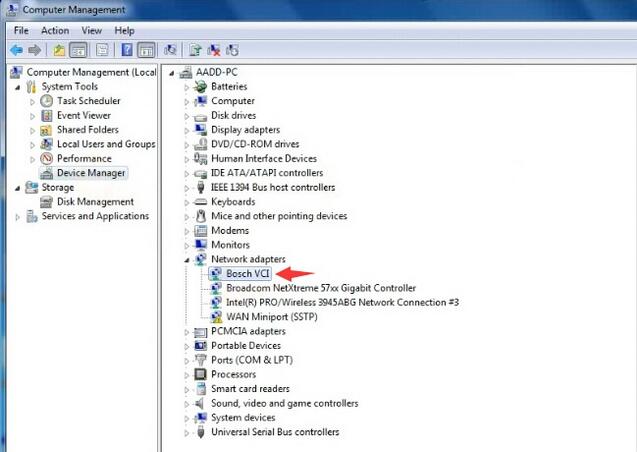
Open Device Manager to check the Bosch JLR DoIP VCI adapter is well connected
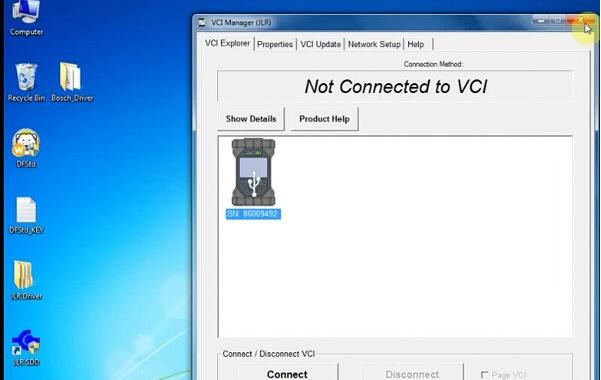
Open VCI Manager on desktop to make sure the Manager detect OBD2 Scanner JLR VCI which indicates interface is well connected
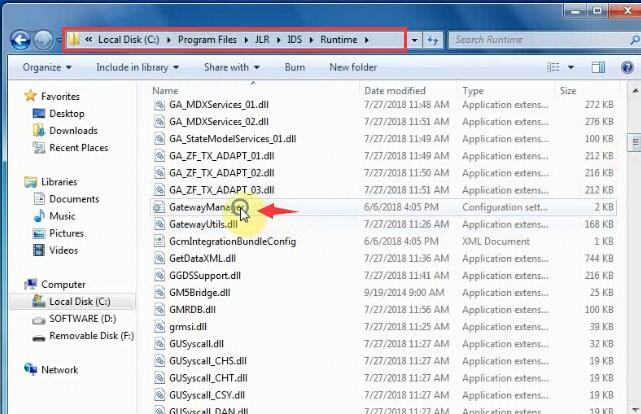
Right click JLR SDD software on desktop->Find File location C:/Program Files/JLR/SDD/Runtime
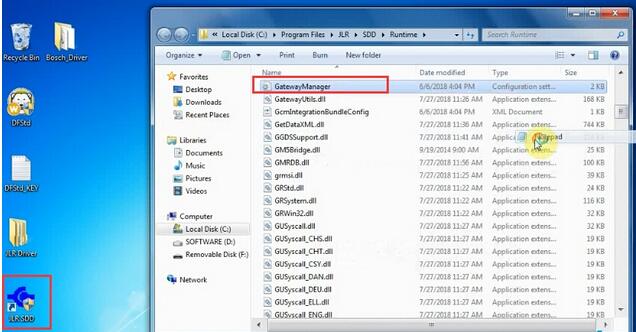
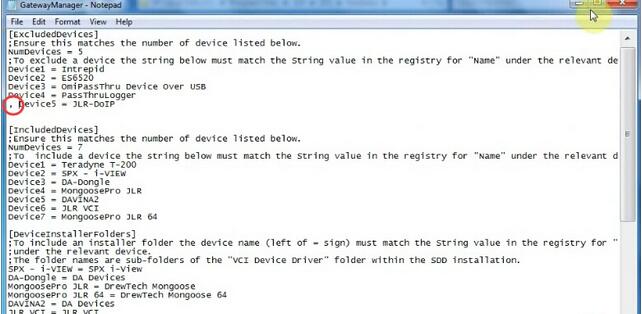
Open the GatewayManager with Notepad
Find “Device5 = JLR-DOIP” and change value to “, Device5 = JLR-DOIP”


Find Go to C:/Program Files/JLR/IDS/Runtime
Open the GatewayManager with Notepad
Find “Device5 = JLR-DOIP” and change value to “, Device5 = JLR-DOIP”
Setup completed.
Now you can run JLR SDD and Pathfinder software